


How to Install and Run MongoDB on Kubernetes?
https://devopscube.com/deploy-mongodb-kubernetes/
MongoDB is known as a document-oriented database server. A New York-based organization called 10 gen was building a platform as a service similar to window azure, and then developed MongoDB as a PAAS (Platform As A Service) in 2007 and later released it as an open source database. server in 2009 and then the company gained popularity as MongoDB Inc where the word Mongo is derived from Humongous. In simpler terms, we can define it as an open-source database server product that is used to store documents. Here, each component needed to use MongoDB in Kubernetes is described, also how to make the collection accessible outside of Kubernetes. Also how to perform basic tasks within MongoDB. As a beginner, creating individual sections while understanding the steps involved is a great way to learn about Kubernetes and MongoDB.
MongoDB Cluster Kubernetes Manifests
All Kubernetes Mongodb YAML used in this guide is hosted on Github. Clone the repository for reference and use.

We have explained all the MongoDB Kubernetes YAML files. If you don’t want to go through creating each manifest, just clone the repo and execute the following command from the cloned directory.
kubectl apply -f .
After you deploy MongoDB on kubernetes, to clean up the deployment objects, execute the following.
kubectl delete -f .
Let’s get started with the setup.
Create MongoDB Secrets
Secrets in Kubernetes are the objects used for supplying sensitive information to containers. They are like ConfigMaps with the difference that data is stored in an encoded format.
For the security of our MongoDB instance, it is wise to restrict access to the database with a password. We will use Secrets to mount our desired passwords to the containers.
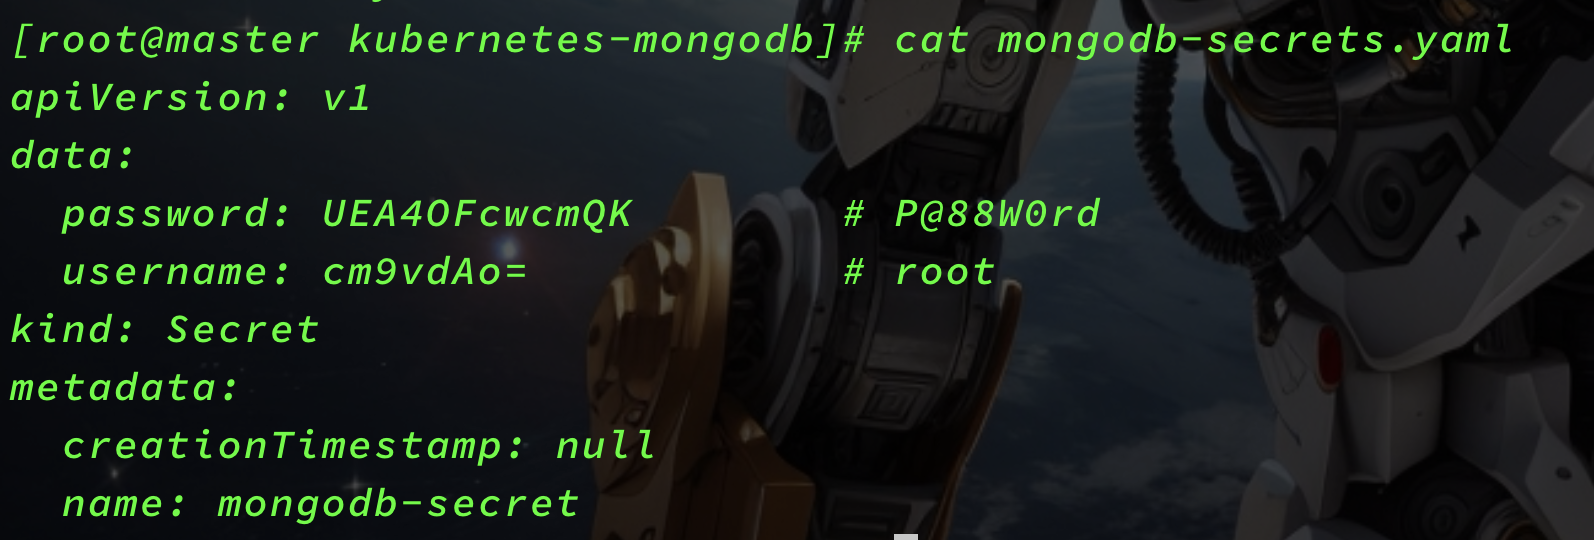
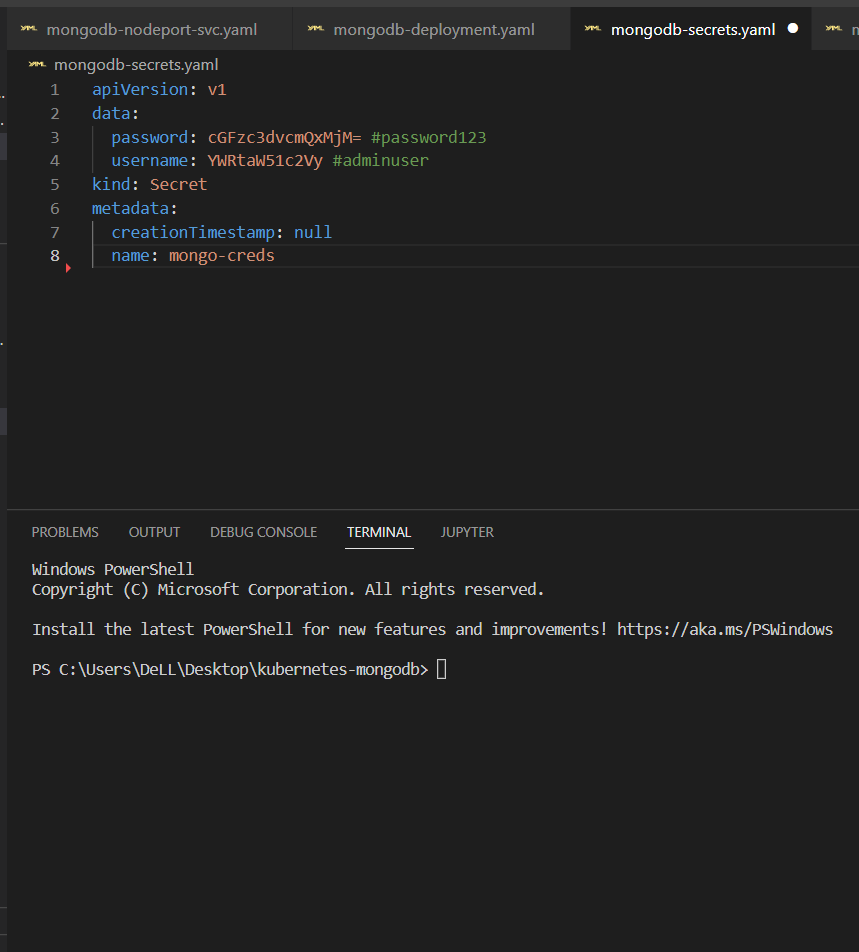
Save the following manifest as mongodb-secrets.yaml
apiVersion: v1
data:
  password: UEA4OFcwcmQK        # P@88W0rd
  username: cm9vdAo=            # root
kind: Secret
metadata:
  creationTimestamp: null
  name: mongodb-secret
Create the Secret.
kubectl apply -f mongodb-secrets.yaml
We’ll log in using these credentials.
Tip: Decoding contents of Secret objects
Kubernetes stores the content of all secrets in a base 64 encoded format. If you want to see how your string will appear in a base64 format, execute the following.
echo "root" | base64
cm9vdAo=
echo "P@88W0rd" | base64
UEA4OFcwcmQK
//after encoding it, this becomes cm9vdAo= & UEA4OFcwcmQK
如果想要解决一个base64加密的字符串,可以执行以下命令:
echo "cm9vdAo=" | base64 --decode
//after decoding it, this will give root
Create MongoDB Persistent Volume
We require volumes to store the persistent data. In this way, even if our pod goes down – the data is not lost.
In Kubernetes, there are two objects which are required for creating volumes.
- PersistentVolumes (PV): are objects which map to a storage location. It’s a piece of storage in the cluster that has been provisioned by an administrator.
- Persistent Volume Claims (PVC): are Kubernetes objects that act as requests for storage. Kubernetes looks for a PV from which space can be claimed and assigned for a PVC. PVC works only if you have dynamic volume provisioning enabled in the Kubernetes cluster.
Let’s create one PVC for our MongoDB instance.
Save the following manifest as mongodb-pvc.yaml.
apiVersion: v1
kind: PersistentVolumeClaim
metadata:
  name: pvc
spec:
  storageClassName: ""
  accessModes:
    - ReadWriteOnce
  volumeName: pv
  resources:
    requests:
      storage: 10 Gi
Create the PV.
kubectl create -f mongodb-pvc.yaml

Note: If you dont have the option to provisiong, dynamic volumes using PVC, you can use the normal persistant volumes with the following manifest and map it to the deployment
apiVersion: v1
kind: PersistentVolume
metadata:
  name: mongo-data
spec:
  accessModes:
    - ReadWriteOnce
  capacity:
    storage: 1Gi
  hostPath:
    path: /data/mongo

Deployments vs StatefulSets
People beginning their journey into containers and Kubernetes, often get confused about the use cases of Kubernetes Deployment and Statefulset. Let’s try to understand this briefly.
A deployment is a Kubernetes object which is preferred when deploying a stateless application or when multiple replicas of pods can use the same volume.
A stateful set is a Kubernetes object which is preferred when we require each pod to have its own independent state and use its own individual volume.
Another major difference between them is the naming convention for pods. In the case of deployments, pods are always assigned a unique name but this unique name changes after the pod are deleted & recreated.
In the case of the stateful set – each pod is assigned a unique name and this unique name stays with it even if the pod is deleted & recreated.
Let's take an example of mongodb to understand the difference better.

Case of deployments: name of pod initially: mongo-bcr25qd41c-skxpe
name of pod after it gets deleted & recreated: mongo-j545c6dfk4-56fcs
Here, pod name got changed.

Case of statefulsets: name of pod initially: mongo-0
name of pod after it gets deleted & recreated: mongo-0 Here, pod name remained the same.
Here, in this example we are deploying a standalone MongoDB instance, therefore – we can use a deployment object. This is because only one pod will be spun up.
Deploying the MongoDB Deployment
Let’s create the Deployment now. I have added an explanation for the MongoDB deployment file as well towards the end of this section.
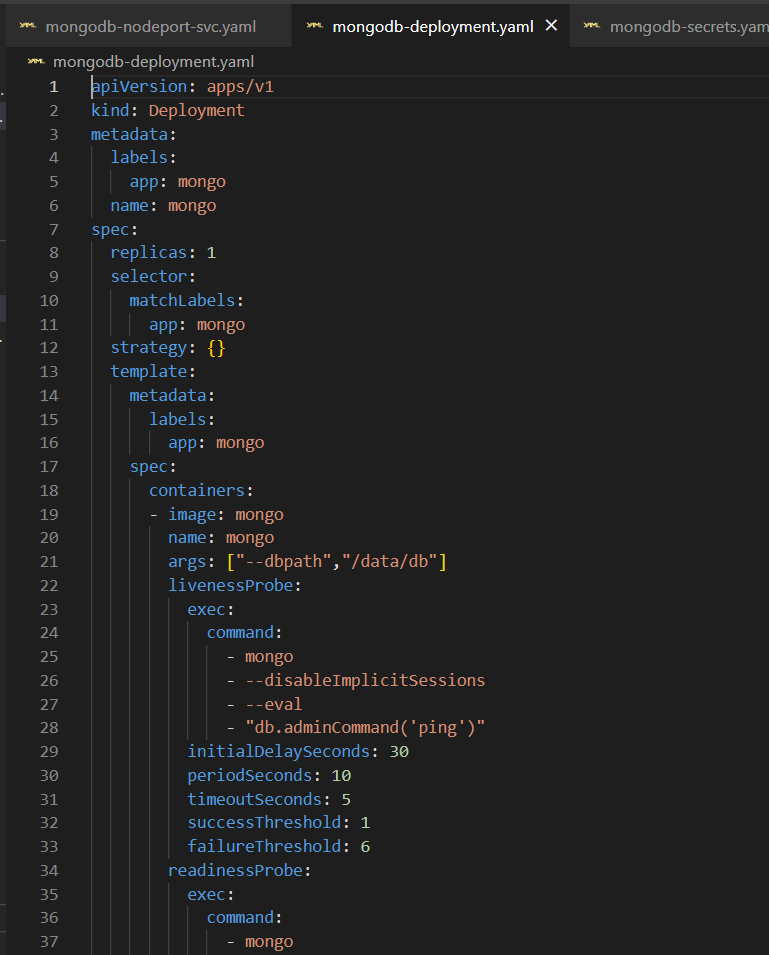
Save the following manifest as mongodb-deployment.yaml. Here we use the official mongo image from docker hub.
apiVersion: apps/v1
kind: Deployment
metadata:
  creationTimestamp: null
  labels:
    app: mongo
  name: mongo
spec:
  replicas: 1
  selector:
    matchLabels:
      app: mongo
  strategy: {}
  template:
    metadata:
      creationTimestamp: null
      labels:
        app: mongo
    spec:
      containers:
      - image: mongo
        name: mongo
        args: ["--dbpath","/data/db"]
        livenessProbe:
          exec:
            command:
              - mongo
              - --disableImplicitSessions
              - --eval
              - "db.adminCommand('ping')"
          initialDelaySeconds: 30
          periodSeconds: 10
          timeoutSeconds: 5
          successThreshold: 1
          failureThreshold: 6
        readinessProbe:
          exec:
            command:
              - mongo
              - --disableImplicitSessions
              - --eval
              - "db.adminCommand('ping')"
          initialDelaySeconds: 30
          periodSeconds: 10
          timeoutSeconds: 5
          successThreshold: 1
          failureThreshold: 6
        env:
        - name: MONGO_INITDB_ROOT_USERNAME
          valueFrom:
            secretKeyRef:
              name: mongo-creds
              key: username
        - name: MONGO_INITDB_ROOT_PASSWORD
          valueFrom:
            secretKeyRef:
              name: mongo-creds
              key: password
        volumeMounts:
        - name: "mongo-data-dir"
          mountPath: "/data/db"
      volumes:
      - name: "mongo-data-dir"
        persistentVolumeClaim:
          claimName: "pvc"
Create the deployment.
kubectl apply -f mongodb-deployment.yaml
The Deployment YAML of MongoDB has a lot of components such as env vars from secrets, probes, etc. Let us dive deeper and understand what each part is doing.
Env vars injected through secrets
Sometimes the containers need to know the sensitive data to use it.
E.g. to assign a password to the MongoDB database, the required password must be supplied securely to the MongoDB container.
env:
 - name: MONGO_INITDB_ROOT_USERNAME
   valueFrom:
      secretKeyRef:
         name: mongo-creds
         key: username
 - name: MONGO_INITDB_ROOT_PASSWORD
   valueFrom:
      secretKeyRef:
         name: mongo-creds
         key: password
Probes: Probes ensure that the container does not get stuck in a loop due to any bug and can be restarted automatically in case an unexpected error comes up.
 livenessProbe:
          exec:
            command:
              - mongo
              - --disableImplicitSessions
              - --eval
              - "db.adminCommand('ping')"
          initialDelaySeconds: 30
          periodSeconds: 10
          timeoutSeconds: 5
          successThreshold: 1
          failureThreshold: 6

readinessProbe:
          exec:
            command:
              - mongo
              - --disableImplicitSessions
              - --eval
              - "db.adminCommand('ping')"
          initialDelaySeconds: 30
          periodSeconds: 10
          timeoutSeconds: 5
          successThreshold: 1
          failureThreshold: 6
Basic principle of the above probes
Here, we are running a MongoDB command which pings the database.
In case the container can ping – the command exits with an exit code of 0 i.e. successful execution. In case, the container is not able to ping – the command exits with an exit code of 1 i.e. unsuccessful execution.
This concept is valid for everything in Kubernetes probes. If the command exits with a code of 0 – it means success and code of 1 means unsuccessful i.e. probe may fail.
Connecting to MongoDB from Outside
Let’s try and access the database from outside the cluster. In order to do so, we must create another Kubernetes Service.
Services in Kubernetes are the objects that pods use to communicate with each other. ClusterIP type services are usually used for inter-pod communication.
For a beginner, it’s important to know that there are two types of ClusterIP services
- Headless Services
- Services
Normal Kubernetes services act as load balancers and follow round-robin logic to distribute loads. Headless services don’t act like load balancers. Also, normal services are assigned IPs by Kubernetes whereas Headless services are not. Headless services are primarily used when we deploy statefulset applications.
In the case of our MongoDB deployment example, we will use the normal service with Nodeport 32000 as we are using the type deployment.
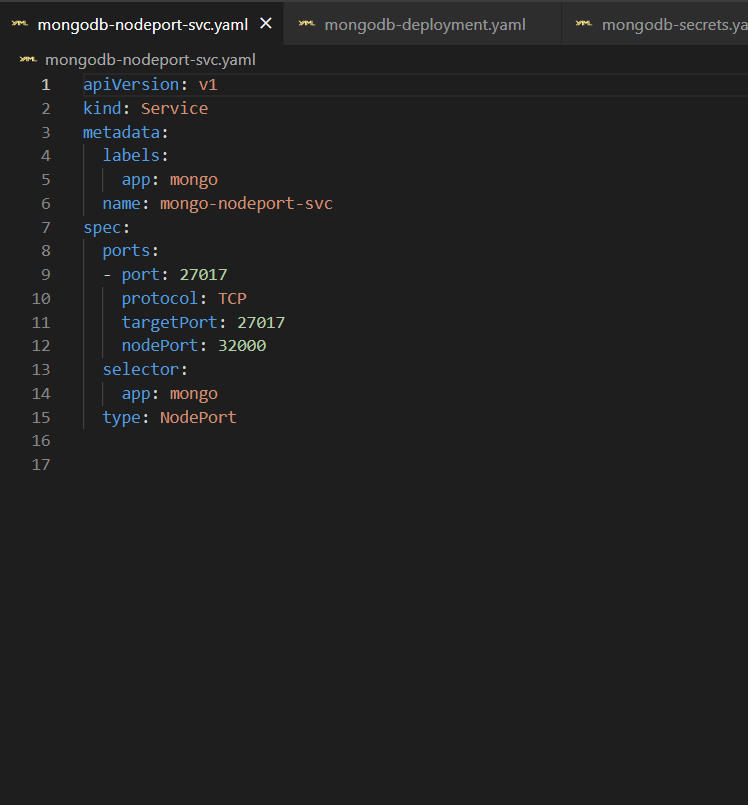
Let’s create a NodePort type service. Save the below Kubernetes MongoDB service YAML as mongodb-nodeport-svc.yaml.
apiVersion: v1
kind: Service
metadata:
  labels:
    app: mongo
  name: mongo-nodeport-svc
spec:
  ports:
  - port: 27017
    protocol: TCP
    targetPort: 27017
    nodePort: 32000
  selector:
    app: mongo
  type: NodePort
status:
  loadBalancer: {}
Create the svc.
kubectl create -f mongodb-nodeport-svc.yaml
To connect from outside the Kubernetes cluster, you must use the Kubernetes cluster’s worker node IP address or a load balancer address. In case you are following on Minikube, you can use minikube’s IP to connect.
To see minikube IP or service URLs, use the following commands
minikube ip
minikube service --url mongo-nodeport-svc
Command to connect:
mongo --host <ip> --port <port of nodeport svc> -u adminuser -p password123
Exploring MongoDB shell
Now, that we have created our MongoDB instance, let us try to run some basic commands inside it.
Let’s create a dedicated mongo client from where we will access the MongoDB database.
Save the following manifest as mongodb-client.yaml
apiVersion: apps/v1
kind: Deployment
metadata:
  creationTimestamp: null
  labels:
    app: mongo-client
  name: mongo-client
spec:
  replicas: 1
  selector:
    matchLabels:
      app: mongo-client
  strategy: {}
  template:
    metadata:
      creationTimestamp: null
      labels:
        app: mongo-client
    spec:
      containers:
      - image: mongo
        name: mongo-client
        env:
        - name: mongo-client_INITDB_ROOT_USERNAME
          value: 'dummy'
        - name: mongo-client_INITDB_ROOT_PASSWORD
          value: 'dummy'
Deploy the client.
kubectl create -f mongodb-client.yaml
After the client gets created. Follow the below steps to access MongoDB.
Exec into the client.
kubectl exec deployment/mongo-client -it -- /bin/bash
Login into the MongoDB shell
mongo --host mongo-nodeport-svc --port 27017 -u adminuser -p password123
Display list of DBs
show dbs
Get inside a particular DB.
use db1
Display a list of collections inside the ‘db1’ database.
show collections
Insert data into the db1 database.
Let’s say we want to enter data about DevOps blogs.
db.blogs.insert({name: "devopscube" })
Display data from db1 database.
Let’s say we want to see data inside the blog’s collection.
db.blogs.find()
Deploy MongoDB on Kubernetes Using Helm
Now that, you know how to deploy MongoDB using individual manifests, you can use helm to deploy MongoDB.
If you don’t have helm installed, follow this helm tutorial to get started.
We will use the Bitnami helm chart to install MongoDB. It uses a deployment with persistent volume as it is a single pod setup.
First, add the bitnami helm repo.
helm repo add bitnami https://charts.bitnami.com/bitnami
Deploy MongoDB using the helm chart with the release name mongodb-dev
helm install mongodb-dev bitnami/mongodb
Once installed, you will see all the details to connect to the MongoDb deployment in the output as shown below.
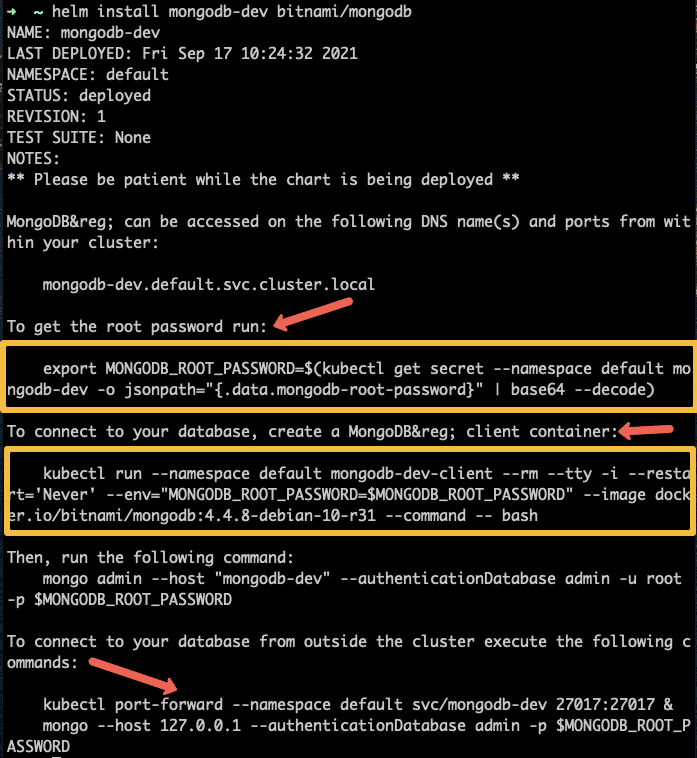
This chart does not come with the client and NodePort service. You can use our client and Nodeport svc yamls to connect to the deployed MongoDB.
To delete the helm deployment, use the following command.
helm delete mongodb-dev
MongoDb performance metrics
MongoDB provides features that show the performance characteristics of each query if required. Information such as execution success/failure, total execution time, and no. of keys examines is accessible.
Let’s try:
use db1
db.blogs.find().explain("executionStats")
It will give the following information as a performance metric.
"executionStats" : {
		"executionSuccess" : true,
		"nReturned" : 1,
		"executionTimeMillis" : 0,
		"totalKeysExamined" : 0,
		"totalDocsExamined" : 1,
		"executionStages" : {
			"stage" : "COLLSCAN",
			"nReturned" : 1,
			"executionTimeMillisEstimate" : 0,
			"works" : 3,
			"advanced" : 1,
			"needTime" : 1,
			"needYield" : 0,
			"saveState" : 0,
			"restoreState" : 0,
			"isEOF" : 1,
			"direction" : "forward",
			"docsExamined" : 1
		}
	},
Other ways to get performance metrics can be explored on the official documentation.
Further Research
Now that the basics have been made clear to you, feel free to explore other things about MongoDB such as arbiters, failover, and replica sets. These are things that usually come in handy when deploying to production.
When it comes to production implementation, Kubernetes custom resources and operators are used to deploy and manage MongoDB statefulset clusters due to the complexity involved in managing data. Do check out the following resources.
Conclusion
In this Kubernetes tutorial, we have learned how to create a MongoDB deployment instance, a client to connect with it, ran basic operations like entering data, and also explored connecting from outside the Kubernetes cluster.
If you found this helpful, do share it among your colleagues and network.


评论区