


1.Keepalived高可用软件
Keepalived软件起初是专为LVS负载均衡软件设计的,用来管理并监控LVS集群系统中各个服务节点的状态,后来又加入了可以实现高可用的VRRP功能。因此,keepalived除了能够管理LVS软件外,还可以作为其他服务的高可用解决方案软件。
keepalived软件主要是通过VRRP协议实现高可用功能的。VRRP是Virtual Router Redundancy Protocol(虚拟路由冗余协议)的缩写,VRRP出现的目的就是为了解决静态路由的单点故障问题的,它能保证当个别节点宕机时,整个网络可以不间断地运行。所以,keepalived一方面具有配置管理LVS的功能,同时还具有对LVS下面节点进行健康检查的功能,另一方面也可以实现系统网络服务的高可用功能。
2.Keepalived高可用故障切换转移原理
Keepalived高可用服务对之间的故障切换转移,是通过VRRP来实现的。在keepalived服务工作时,主Master节点会不断地向备节点发送(多播的方式)心跳消息,用来告诉备Backup节点自己还活着。当主节点发生故障时,就无法发送心跳的消息了,备节点也因此无法继续检测到来自主节点的心跳了。于是就会调用自身的接管程序,接管主节点的IP资源和服务。当主节点恢复时,备节点又会释放主节点故障时自身接管的IP资源和服务,恢复到原来的备用角色。
3.Keepalived高可用实验环境说明
如下图所示,前端有两台的Nginx负载均衡器,用来分发接收到客户端的请求。在前文已经配置好了Nginx01,Nginx02也是一样的配置。现在要在两个Nginx负载均衡器上做高可用配置,Nginx01作为主节点,Nginx02作为备节点。
4.安装并启用keepalived
keepalived的安装非常简单,直接使用yum来安装即可。
yum install keepalived -y
安装之后,启动keepalived服务,顺便把keepalived写入开机启动的脚本里面去。。
/etc/init.d/keepalived star
echo "/etc/init.d/keepalived start" >>/etc/rc.local
启动之后会有三个进程,没问题之后可以关闭keepalived软件,接下来要修改keepalived的配置文件。

5.修改keepalived配置文件并且重启keepalived服务
/etc/init.d/keepalived stop    #关闭keepalived服务
vim /etc/keepalived/keepalived.conf  #用vim打开编辑
- 主节点
# vi /etc/keepalived/keepalived.conf
! Configuration File for keepalived
global_defs {
	## keepalived 自带的邮件提醒需要开启 sendmail 服务。 建议用独立的监控或第三方 SMTP
	router_id liuyazhuang133 ## 标识本节点的字条串,通常为 hostname
}
## keepalived 会定时执行脚本并对脚本执行的结果进行分析,动态调整 vrrp_instance 的优先级。如果脚本执行结果为 0,并且 weight 配置的值大于 0,则优先级相应的增加。如果脚本执行结果非 0,并且 weight配置的值小于 0,则优先级相应的减少。其他情况,维持原本配置的优先级,即配置文件中 priority 对应的值。
vrrp_script chk_nginx {
	script "/etc/keepalived/nginx_check.sh" ## 检测 nginx 状态的脚本路径
	interval 2 ## 检测时间间隔
	weight -20 ## 如果条件成立,权重-20
}
## 定义虚拟路由, VI_1 为虚拟路由的标示符,自己定义名称
vrrp_instance VI_1 {
	state MASTER ## 主节点为 MASTER, 对应的备份节点为 BACKUP
	interface eth0 ## 绑定虚拟 IP 的网络接口,与本机 IP 地址所在的网络接口相同, 我的是 eth0
	virtual_router_id 33 ## 虚拟路由的 ID 号, 两个节点设置必须一样, 可选 IP 最后一段使用, 相同的 VRID 为一个组,他将决定多播的 MAC 地址
	mcast_src_ip 192.168.50.133 ## 本机 IP 地址
	priority 100 ## 节点优先级, 值范围 0-254, MASTER 要比 BACKUP 高
	nopreempt ## 优先级高的设置 nopreempt 解决异常恢复后再次抢占的问题
	advert_int 1 ## 组播信息发送间隔,两个节点设置必须一样, 默认 1s
	## 设置验证信息,两个节点必须一致
	authentication {
		auth_type PASS
		auth_pass 1111 ## 真实生产,按需求对应该过来
	}
	## 将 track_script 块加入 instance 配置块
	track_script {
		chk_nginx ## 执行 Nginx 监控的服务
	} #
	# 虚拟 IP 池, 两个节点设置必须一样
	virtual_ipaddress {
		192.168.50.130 ## 虚拟 ip,可以定义多个
	}
}
| 主节点的配置文件 | 备节点的配置文件 |
|---|---|
| ! Configuration File for keepalived global_defs { notification_email { acassen@firewall.loc failover@firewall.loc sysadmin@firewall.loc } notification_email_from Alexandre.Cassen@firewall.loc smtp_server 192.168.200.1 smtp_connect_timeout 30 router_id lb01 } vrrp_instance VI_1 { state MASTER interface eth1 virtual_router_id 55 priority 150 advert_int 1 authentication { auth_type PASS auth_pass 123456 } virtual_ipaddress { 192.168.31.5/24 dev eth1 label eth1:1 } } ...... | ! Configuration File for keepalived global_defs { notification_email { acassen@firewall.loc failover@firewall.loc sysadmin@firewall.loc } notification_email_from Alexandre.Cassen@firewall.loc smtp_server 192.168.200.1 smtp_connect_timeout 30 router_id lb02 } vrrp_instance VI_1 { state BACKUP interface eth1 virtual_router_id 55 priority 100 advert_int 1 authentication { auth_type PASS auth_pass 123456 } virtual_ipaddress { 192.168.31.5/24 dev eth1 label eth1:1 } } ...... |
- 从节点
# vi /etc/keepalived/keepalived.conf
! Configuration File for keepalived
global_defs {
	router_id liuyazhuang134
}
vrrp_script chk_nginx {
	script "/etc/keepalived/nginx_check.sh"
	interval 2
	weight -20
}
vrrp_instance VI_1 {
	state BACKUP
	interface eth1
	virtual_router_id 33
	mcast_src_ip 192.168.50.134
	priority 90
	advert_int 1
	authentication {
		auth_type PASS
		auth_pass 1111
	}
	track_script {
		chk_nginx
	}
	virtual_ipaddress {
		192.168.50.130
	}
}
! Configuration File for keepalived

global_defs {
   notification_email {
     acassen@firewall.loc
     failover@firewall.loc
     sysadmin@firewall.loc
   }
   notification_email_from Alexandre.Cassen@firewall.loc
   smtp_server 192.168.200.1
   smtp_connect_timeout 30
   router_id lb01
}

vrrp_instance VI_1 {
    state MASTER
    interface eth1
    virtual_router_id 55
    priority 150
    advert_int 1
    authentication {
        auth_type PASS
        auth_pass 123456
    }
    virtual_ipaddress {
        192.168.31.5/24 dev eth1 label eth1:1
    }
}

......
router_id 是路由标识,在一个局域网里面应该是唯一的;vrrp_instance VI_1{...}这是一个VRRP实例,里面定义了keepalived的主备状态、接口、优先级、认证和IP信息;state 定义了VRRP的角色,interface定义使用的接口,这里我的服务器用的网卡都是eth1,根据实际来填写,virtual_router_id是虚拟路由ID标识,一组的keepalived配置中主备都是设置一致,priority是优先级,数字越大,优先级越大,auth_type是认证方式,auth_pass是认证的密码。 virtual_ipaddress {...}定义虚拟IP地址,可以配置多个IP地址,这里我定义为192.168.31.5,绑定了eth1的网络接口,虚拟接口eth1:1.
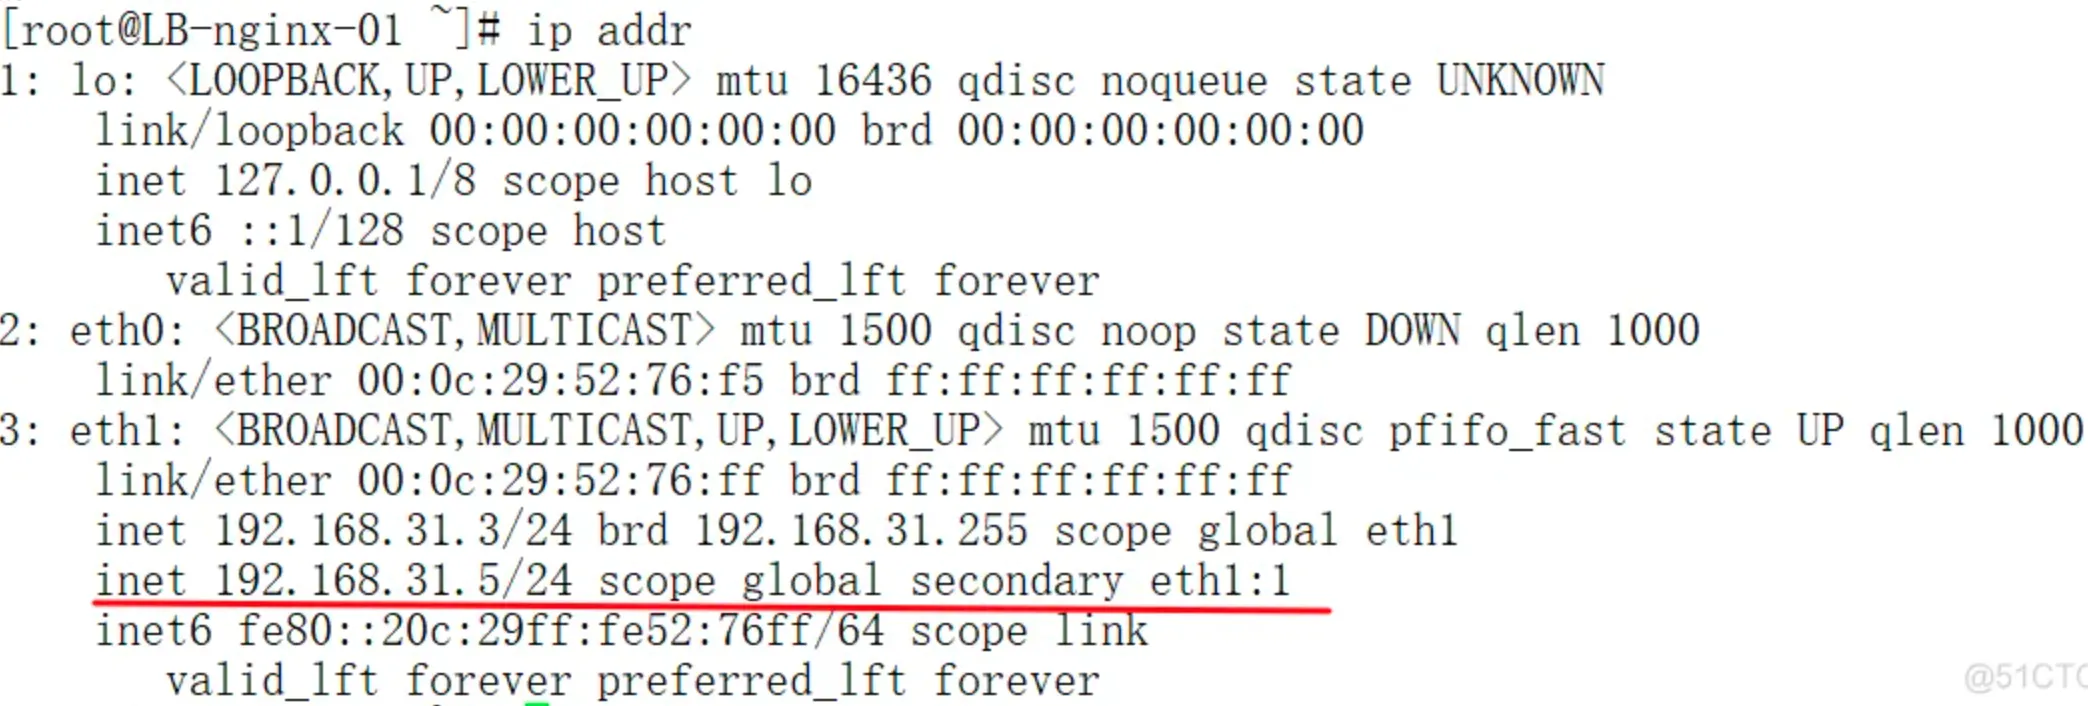
修改好主节点之后,保存退出,然后启动keepalived,几分钟内会生成一个虚拟IP:192.168.31.5
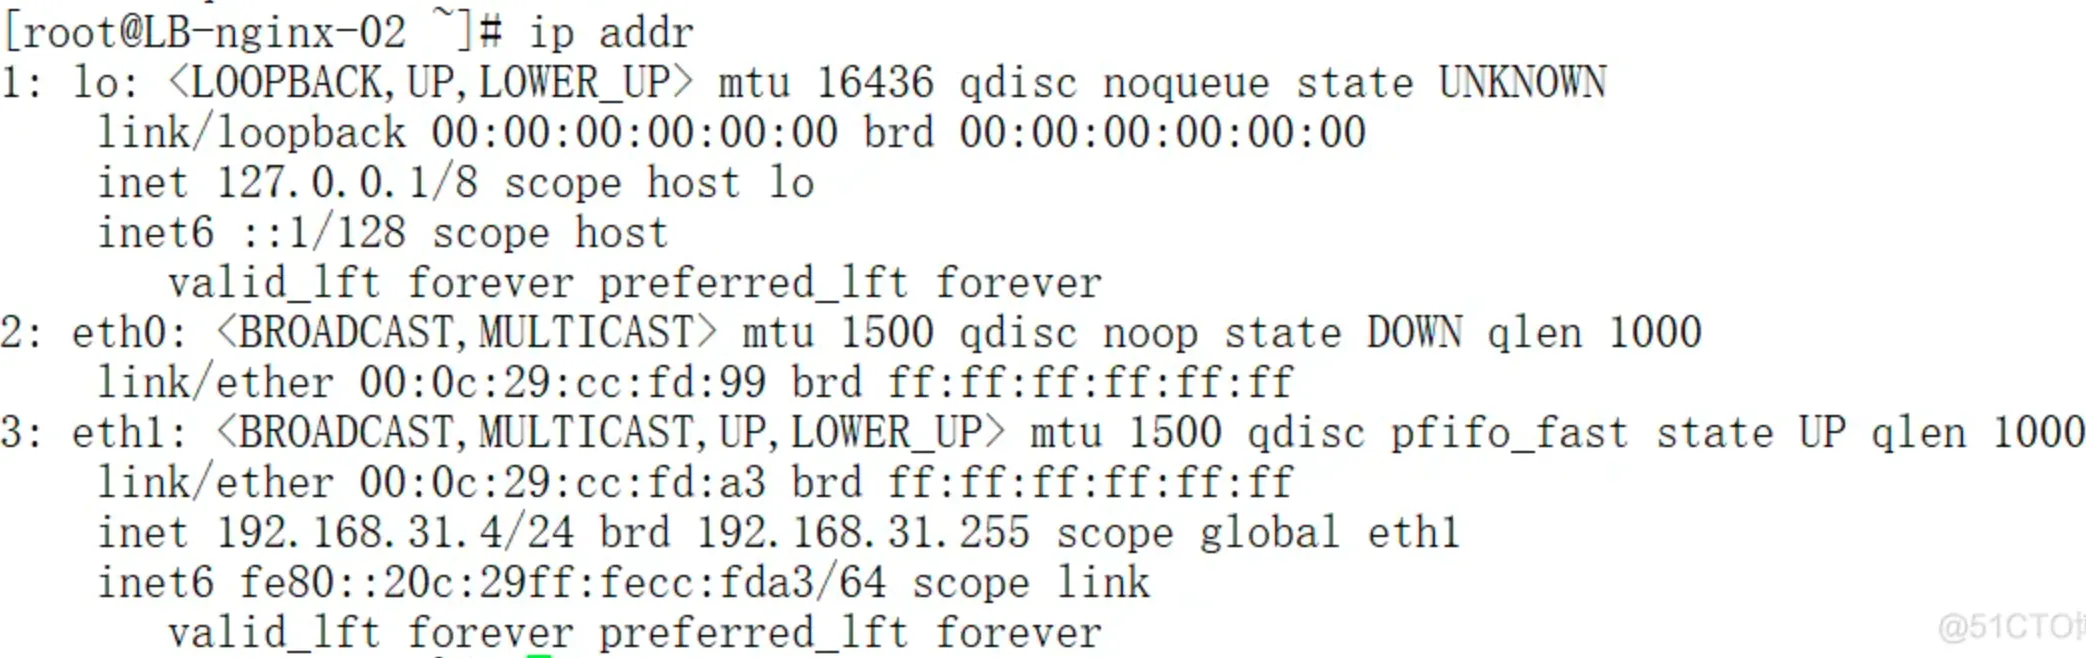
然后修改备节点的配置文件,保存退出后启动keepalived,不会生成虚拟IP,如果生成那就是配置文件出现了错误。备节点和主节点争用IP资源,这个现象叫做“裂脑”。
6.进行高可用的主备服务器切换实验
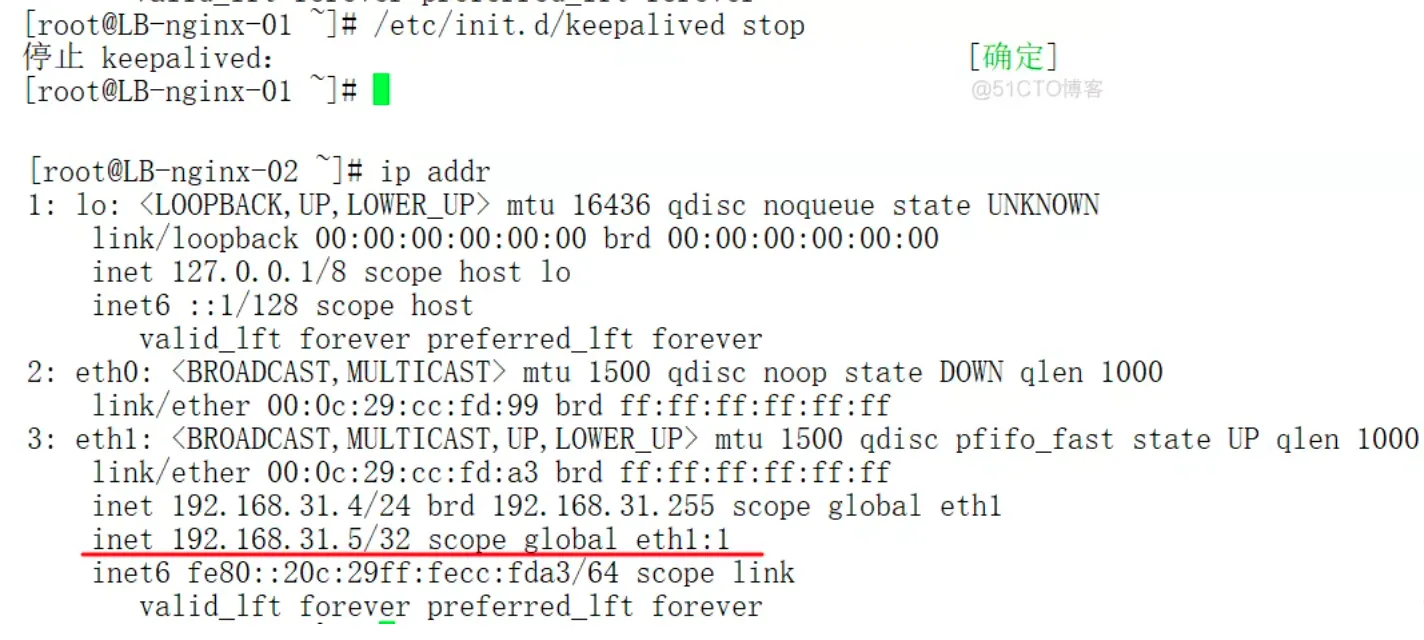
停掉主节点的keepalived服务,查看备节点会不会生成VIP:192.168.31.5
启动主节点的keepalived服务,然后查看主节点和备节点的VIP,主节点应该会抢夺回来VIP:

7.搭配Nginx负载均衡来测试
修改hosts文件,把域名指向到VIP上
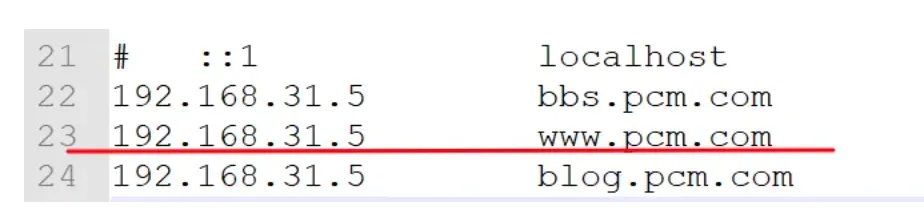
然后用浏览器打开www.pcm.com的页面,在web01上查看access.log日志记录到的客户端IP地址
8.编写Nginx Web服务的守护脚本
上面的实验测试有一个问题就是,我们是用Nginx做负载均衡分发请求的数据包的。如果主节点的Keepalived服务正常运行,而Nginx运行异常,那么将会出现Nginx负载均衡服务失灵,无法切换到Nginx负载均衡器02上,后端的Web服务器无法收到请求。所以,我们应该要检测Nginx的服务是否正常运行,如果不是正常运行,应该停掉Keepalived的服务,这样才能自动切换到备节点上。
我们可以通过检测80端口是否开启来判定Nginx的运行情况,2秒钟检测一次,脚本如下
#!/bin/bash
while true
do
if [ $(netstat -tlnp|grep nginx|wc -l) -ne 1 ]
then
	/etc/init.d/keepalived stop
fi
sleep 2
done

#  `ps -ef | grep -v grep | grep nginx | wc -l`
# vi /etc/keepalived/nginx_check.sh
#!/bin/bash
A=`ps -C nginx –no-header |wc -l`
if [ $A -eq 0 ];then
/usr/local/nginx/sbin/nginx
sleep 2
if [ `ps -C nginx --no-header |wc -l` -eq 0 ];then
	killall keepalived
fi
fi


# `ps -ef | grep -v grep | grep nginx | wc -l`
实验的结果可以后台执行命令之后然后停止Nginx服务检验


评论区